How to lock your Windows 10 PC.
It is a best idea to lock your computer when you are moving away from it. Even so for a short period. There are several ways to do this and one of the simplest ways is to press Windows + L keys on your device.
Even so, you can also create a shortcut, clicking on which the computer will automatically get locked. In this step-by-step guide, we will appear you how to create a shortcut to lock your Windows 10 computer.
RELATED ARTICLE | How to create a full system backup on Windows 10
RELATED ARTICLE | How to Install Multiple Apps at Once on Your Windows PC
Create a shortcut to lock Windows 10 PC
Step 1: On the desktop of your computer on screen, right-click anywhere on the blank screen, and from the context menu, select the “New” option.
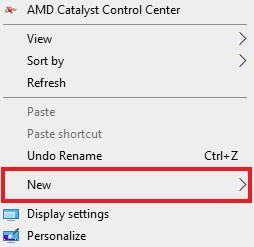
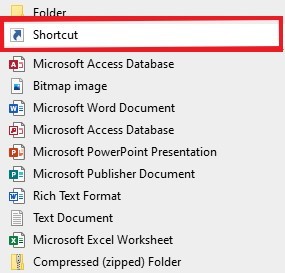
Step 2: Hovering the mouse cursor on the “New” choice will disclose a secondary drop-down menu and from there, click on the “Shortcut” option.
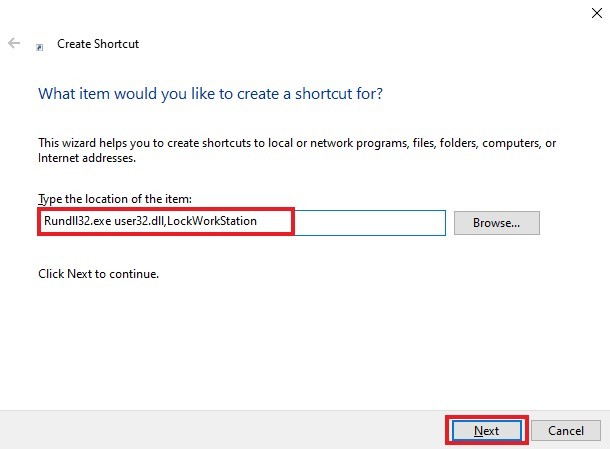
Step 3: Now, here’s a new window will show. In the “type the location of the item” textbox, and enter the following text:
Step 4: Now in the next step, enter the name of the any shortcut. You can be name it anything for your choice. We are going forwards with the “Lock PC” name.
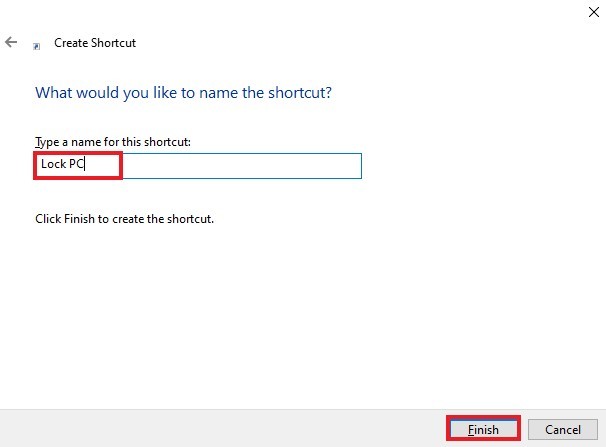
That’s it. You will now show the “Lock PC” shortcut icon on your computer’s device. When you double-click that icon, your computer will be get locked and you will require to enter your password to unlock it.
For the latest interesting or amazing tech, news and reviews, then follow to the INDTECH on Twitter, Facebook, Instagram, youtube, and Google News.
READ ALSO | Google Play Store Removes Paytm App for violating on Policies gambling
READ ALSO | Free Watch IPL 2020: IPL 2020 Free TV, PC, mobile, How to watch free Hotstar?



3 Comments